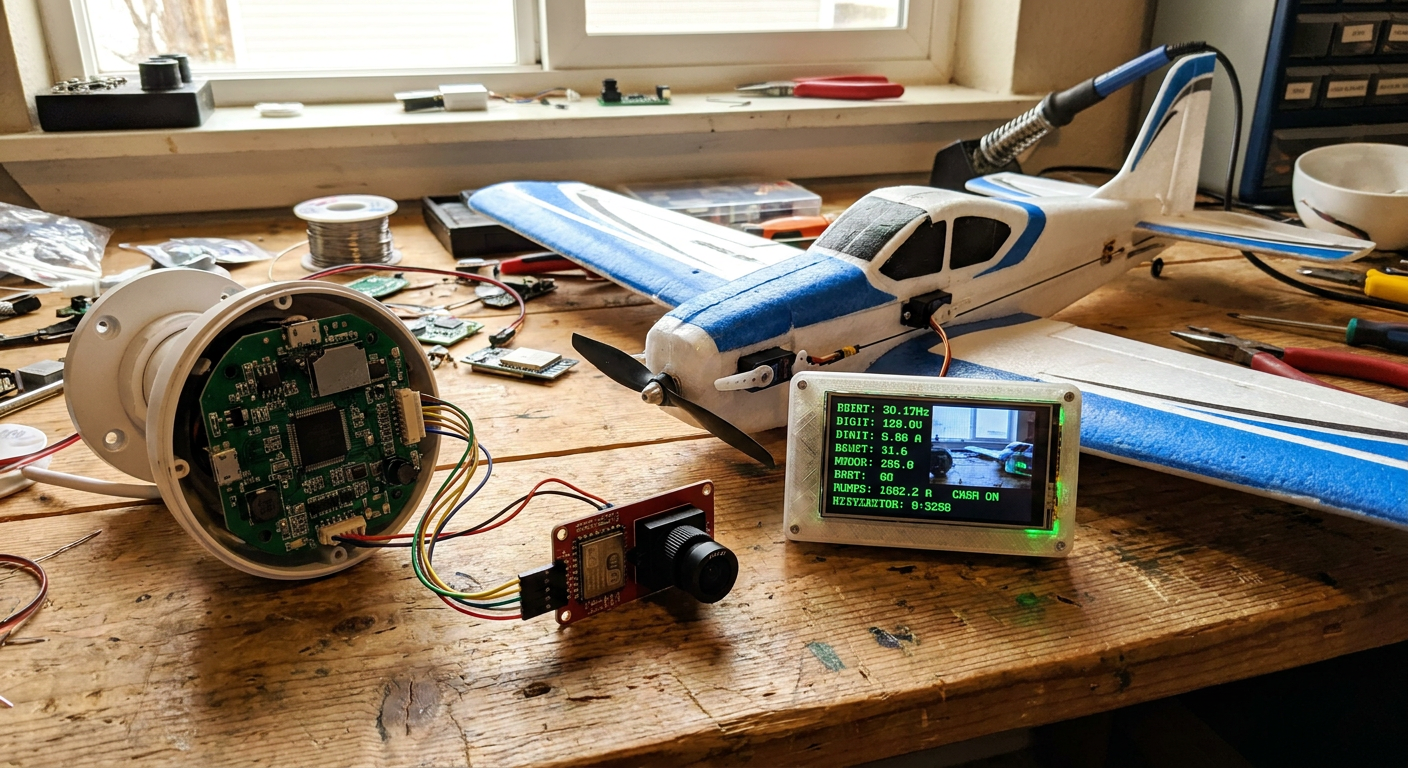
An eighteen-dollar security camera board arrived in a bubble-wrap envelope from AliExpress three weeks ago. It came with an exposed sensor, a screw-on M12 CCTV lens, bare solder pads for power, and zero documentation. Four days later, that same board was sitting in the nose of a battered two-meter foam glider, broadcasting a 1080p digital video feed directly to an old laptop monitor at the edge of the flying field.
If you spend any time on DIY FPV forums, RC Groups, or Discord build channels right now, you have seen the hype around OpenIPC. The promise sounds almost too good to be true. Instead of handing over $150 to $230 for a proprietary digital air unit from Walksnail or DJI, you buy a surplus IP camera board, flash it with open-source firmware, solder on a high-power Wi-Fi broadcast card, and get crisp digital FPV video for a fraction of the price.
We spent the past month building, flashing, breaking, and flying multiple OpenIPC setups. Here is what actually happens when you try to replace polished commercial digital gear with a hacked surveillance camera.
What OpenIPC Actually Is
OpenIPC started as a project to replace closed, insecure stock firmware on consumer IP surveillance cameras with an open-source Linux operating system. In the surveillance world, people use it to stop cheap cameras from phoning home to unknown servers or to add RTSP streams to their home automation rigs.
Around late 2022 and throughout 2023, the FPV community noticed something critical about these camera chips. Modern IP camera system-on-chip hardware, mostly from manufacturers like SigmaStar, HiSilicon, and Xiongmai, includes hardware video encoders that compress raw sensor data into H.264 or H.265 video with surprisingly low processing delay.
Pair one of these camera boards with a standard Wi-Fi adapter running modified broadcast firmware (WFB-ng, or Wi-Fi Broadcast Next Generation), and the board stops behaving like a security camera. Instead, it packets raw video frames directly into unidirectional radio broadcast packets. There is no Wi-Fi handshake, no router, and no TCP retransmission delays. The transmitter simply blasts video frames into the air on 5.8 GHz. If the receiver drops a frame due to distance or multipathing, it just shows a momentary glitch on your screen and waits for the next packet, exactly like an analog FPV system or Walksnail in low-latency mode.
The Shopping List and Real Costs
Advocates love to say you can build a digital FPV setup for twenty bucks. That is technically true if you already own a scrap bin full of 5V step-down regulators, antennas, USB-to-UART adapters, and a receiver ground station. If you start from zero, the math looks a bit different.
Here is what our complete airborne transmitter setup required:
- Camera Board: An SSC338Q or GK7205V200 processor board with an IMX307 or SC3336 image sensor. Cost: $18 to $26 on AliExpress.
- Wi-Fi Broadcast Card: An RTL8812EU or RTL8812AU high-power USB Wi-Fi module, stripped down without its plastic casing. Cost: $14 to $22.
- Voltage Regulator: A clean 5V 3A step-down BEC. Security camera processors brown out easily if the Wi-Fi card pulls a current spike while transmitting at high power. Cost: $4.
- Antenna: A pair of decent 5.8 GHz LHCP or linear omni antennas with U.FL or SMA pigtails. Cost: $12.
- Wiring, heatsinks, and 3D-printed mounts: Roughly $5 in filament and spare wire.
That puts the airborne unit at around $55 to $70. That is still less than half the price of a Walksnail Avatar HD V2 kit ($140 to $160) and roughly a third the cost of a DJI O3 Air Unit ($229).
However, you also need a ground station. DJI and Walksnail sell integrated goggles with built-in receivers. With OpenIPC, your receiver is typically another RTL8812 Wi-Fi card plugged into a Raspberry Pi 4, a Radxa board, or an Android tablet running the WFB-ng viewing client. If you use a Raspberry Pi ($45) plus a receiver Wi-Fi card ($18), twin patch antennas ($25), and an HDMI screen or analog goggles with an HDMI input, your ground station adds about $90 to $130.
If you already own an HDMI-capable set of goggles, like the Skyzone SKY04X, HDZero goggles, or an older set of Fat Sharks, your total out-of-pocket cost is very friendly. If you have to buy brand new goggles just to get an HDMI input, the savings start to narrow.
The Build: A Soldering and Flashing Workout
Commercial digital systems have spoiled us. You screw an air unit into standard 20x20mm or 25.5x25.5mm frame standoffs, plug a single wiring harness into your flight controller, pair the unit with your goggles using a push button, and go fly. OpenIPC is not that.
First, almost all cheap IP camera boards come in a standard security footprint: 38x38mm square, sometimes scored so you can snap edges off to reach 32x32mm. This size is completely fine for a fixed-wing plane, a foam wing, or a large 7-inch cruiser quad. It does not fit neatly into a compact 3-inch or 5-inch racing frame without heavy custom brackets.
Second, the wiring requires steady hands. The Wi-Fi adapter communicates with the camera processor over high-speed USB data lines. On most cheap camera boards, there is no USB port installed. You have to locate the tiny D+ and D- solder pads on the board, run enamel-coated magnet wire or ultra-thin silicone wire to the corresponding pads on the stripped Wi-Fi dongle, and keep the run as short and clean as possible to prevent signal degradation. One slip with the iron on an adjacent surface-mount resistor and the board is dead.
Flashing the board requires a USB-to-UART serial adapter (like an FT232RL or CH340 board). You solder three pins for Ground, RX, and TX, plug it into your computer, open a serial terminal program at 115200 baud, and connect 12V power to the board.
From there, you use the community ipctool script or manually interrupt the U-Boot bootloader over the serial console to flash the OpenIPC binary via TFTP or SD card. The OpenIPC project documentation has improved dramatically over the past year, offering automated web flasher tools for common boards. But if your board uses an unlisted flash memory chip or an unusual pin configuration, you will be searching Russian and Chinese hardware forums to figure out why your kernel is hanging on boot.
If you enjoy tinkering at the bench on a rainy Tuesday evening with a multimeter and a terminal window, it is a deeply rewarding project. If you just want to fly before sunset on Saturday, it will test your patience.
Bench Testing: Image Quality and Latency
Once we got the system flashed, configured, and bound over WFB-ng, the image popped up on an external 7-inch field monitor via HDMI from our Raspberry Pi receiver.
The video clarity is genuine 1080p. The IMX307 sensor handles daylight well, showing crisp details on grass textures, tree branches, and runway markings that look vastly superior to traditional 600TVL analog video. It easily matches the visual fidelity of early Caddx Vista and Walksnail setups in standard daylight conditions.
Where the sensor struggles compared to dedicated FPV cameras is dynamic range handling during rapid attitude changes. Security camera sensors are tuned for static viewing angles on a building wall. When you pitch up toward a bright sky and then roll down into dark trees, the stock auto-exposure algorithm takes half a second to adjust. You get a blown-out sky followed by deep black ground shadows before the sensor catches up. You can tweak gain curves and shutter limits in the OpenIPC configuration files, but it lacks the instant exposure tuning found in dedicated FPV sensors like the RunCam Phoenix or the Walksnail Pro camera.
Then comes the make-or-break metric for FPV: glass-to-glass latency.
We measured latency using the standard stopwatch method: pointing the camera at a high-speed LED millisecond timer running on an iPad, with the receiver screen placed directly beside it, and filming both with a 240fps camera.
Here is how our OpenIPC build stacked up against commercial benchmarks:
- OpenIPC (SSC338Q + RTL8812EU at 1080p 60fps via WFB-ng): 42 to 58 milliseconds average.
- OpenIPC (Tuned 720p 60fps mode with reduced buffer settings): 31 to 41 milliseconds average.
- Walksnail Avatar HD (Standard 720p 60fps low-latency mode): 22 to 32 milliseconds average.
- DJI O3 Air Unit (1080p 60fps): 28 to 38 milliseconds average.
- Traditional 5.8 GHz Analog: 14 to 22 milliseconds average.
An average latency of 35 to 45 milliseconds in 720p mode is completely flyable for general RC aviation. You can cruise a foam airplane, fly scale circuits, hunt thermals in a sailplane, or fly relaxed freestyle on a quad without feeling disconnected from the sticks.
However, it is not fast enough for tight drone racing or proximity flying through dense woods, where every 10 milliseconds of delay translates into several feet of travel at high throttle.
There is also the question of latency jitter. DJI and Walksnail manage packet loss smoothly with dedicated hardware decoders. On OpenIPC, when you fly near the edge of range or through heavy foliage, packet drops can cause small video hitches or frame buffering that push momentary latency above 80 milliseconds until the signal clears. On a fixed-wing plane flying high in open airspace, this is a mild annoyance. On a quad six inches off the deck, it will make you clip a gate.
Range and RF Performance
In our flight tests using a 500mW RTL8812EU transmission module paired with a simple cloverleaf antenna on the plane and a directional patch antenna on the ground station, the RF link proved surprisingly solid.
We flew a two-meter foam motorglider out to 3.2 kilometers (about 2 miles) in an open rural field with clean line-of-sight. The 720p stream remained steady throughout the flight. Telemetry data from our flight controller was multiplexed over the same Wi-Fi broadcast stream using MAVLink, displaying battery voltage, GPS coordinates, and home direction directly on the ground station monitor overlay.
Because WFB-ng uses standard Wi-Fi frequencies on the 5.8 GHz band, you can adjust output power in the software configuration files up to the maximum limit of your RF amplifier (typically 500mW to 1000mW on popular modules).
The big advantage here is antenna flexibility. You are not locked into proprietary micro-connectors. You can solder standard SMA pigtails, use large helical antennas on your ground station, or run dual diversity receivers without buying licensed accessories from a single manufacturer.
Heat, Power, and Flight Reliability
Every piece of FPV gear has an Achilles' heel. For OpenIPC, it is thermal management.
Security camera boards are designed to sit in large plastic housings mounted under roof eaves. They do not have the integrated CNC aluminum casing that acts as a structural heatsink on a Walksnail VTX or a DJI O3. The main processor and the Wi-Fi amplifier chip get blazing hot within two minutes of sitting stationary on a workbench.
If you power up your model on the ground while adjusting control throws or waiting for a GPS lock, the video link will lock up or shut down if you do not have air moving across the chips. We had to glue small copper heatsinks onto the processor and the RF chip using thermal epoxy. In the air, with airflow running through the plane nose cowl, temperatures stayed well within safe limits (around 52 degrees Celsius).
Power clean-up is equally critical. FPV drones and electric planes generate huge voltage spikes and electrical noise from motor ESCs. Plugging an OpenIPC board directly into a noisy battery lead will cause immediate video corruption or board death. A solid low-ESR capacitor on your main battery lead and a dedicated 5V BEC with clean filtering are mandatory.
At MyRC (myrc.ai), where we spend a lot of time mapping out airframe components and balancing payload weights for custom foam and composite builds, the physical layout of OpenIPC is both a benefit and a trade-off. The bare board weighs just 14 grams, and the stripped Wi-Fi card adds 8 grams. That is lighter than many cased commercial air units. But because the components are separated by loose wiring harnesses, you have to spend extra time designing 3D-printed trays and protective air ducts to keep the electronics safe from crash impacts.
OpenIPC vs. The Big Two: How They Really Compare
To make an honest buying decision, it helps to look at where each system actually wins.
| Feature | OpenIPC (DIY Build) | Walksnail Avatar HD | DJI O3 / O4 Ecosystem |
|---|---|---|---|
| Air Unit Cost | $40 - $70 | $130 - $160 | $229+ |
| Setup Difficulty | High (UART flashing, micro-soldering) | Low (Plug-and-play wiring) | Low (Plug-and-play wiring) |
| Average Latency | 35ms - 60ms | 22ms - 35ms | 25ms - 40ms |
| Image Quality | Good 1080p / 720p | Excellent 1080p | Industry-leading 4K recording / 1080p feed |
| Form Factor | 38x38mm or 32x32mm bare board | Standard 20x20 / 25.5mm | Standard 20x20 / 25.5mm |
| Low Light / Night | Excellent with Starlight sensors | Good with Pro camera | Moderate |
| Ecosystem Lock-in | Zero (Open Source) | Medium (Caddx ecosystem) | Total (DJI hardware only) |
| Best Use Case | Fixed-wing, gliders, long-range cruisers | Freestyle quads, tiny whoops, wings | Cinematic drones, high-end freestyle |
Walksnail still holds the sweet spot for quad pilots who want open HDMI ground receiver options without DJI's locked ecosystem, while keeping compact 20x20mm mounting and sub-30ms latency. DJI remains the undisputed king of raw video fidelity, dynamic range handling, and onboard 4K stabilized recording.
OpenIPC dominates on two specific fronts: cost per airframe and customisation.
If you have a hangar with ten different foam airplanes, warbirds, and balsa cruisers, putting a $160 Walksnail VTX into every single model gets expensive quickly. Putting a $35 OpenIPC camera and Wi-Fi pair into five different planes costs less than a single DJI O3 unit. If you lose a plane in a swamp or crash a cheap foamie into a tree, writing off an eighteen-dollar board hurts a lot less than writing off a two-hundred-dollar air unit.
OpenIPC also wins for specialized night flying. Because you can buy boards paired with low-light security sensors like the Sony Starvis IMX385 or IMX462, an OpenIPC setup can literally see in near-total darkness, turning a pitch-black evening field into daylight video. Commercial FPV systems have low-light options, but none offer the extreme light sensitivity of dedicated surveillance silicon.
Who Should Build One?
If you hate command-line prompts, get frustrated when a serial driver fails to install on Windows, or want a clean plug-and-play setup for your 5-inch freestyle drone, do not buy an OpenIPC board. You will spend twenty hours troubleshooting U-Boot configurations, and you will end up wishing you bought a Walksnail kit.
If you are a builder who loves tinkering with open-source firmware, someone flying medium-to-large fixed-wing models, or a hobbyist on a strict budget who wants crisp digital video on multiple planes, OpenIPC is the most interesting thing to happen to RC video in five years.
It is not a direct replacement for DJI or Walksnail in every flight envelope, but it was never meant to be. It is an open, hackable, remarkably cheap alternative that gives control back to the maker at the workbench.
If you want to try it out without risking much cash, pick up an SSC338Q camera board and an RTL8812EU Wi-Fi module from your favorite overseas storefront, grab a USB-to-serial adapter, and start by getting the video stream running on your desktop monitor before you ever mount it in a plane. The OpenIPC community Telegram and Discord channels are active, fast to help, and full of builders solving the exact same quirks you will run into on your first build.