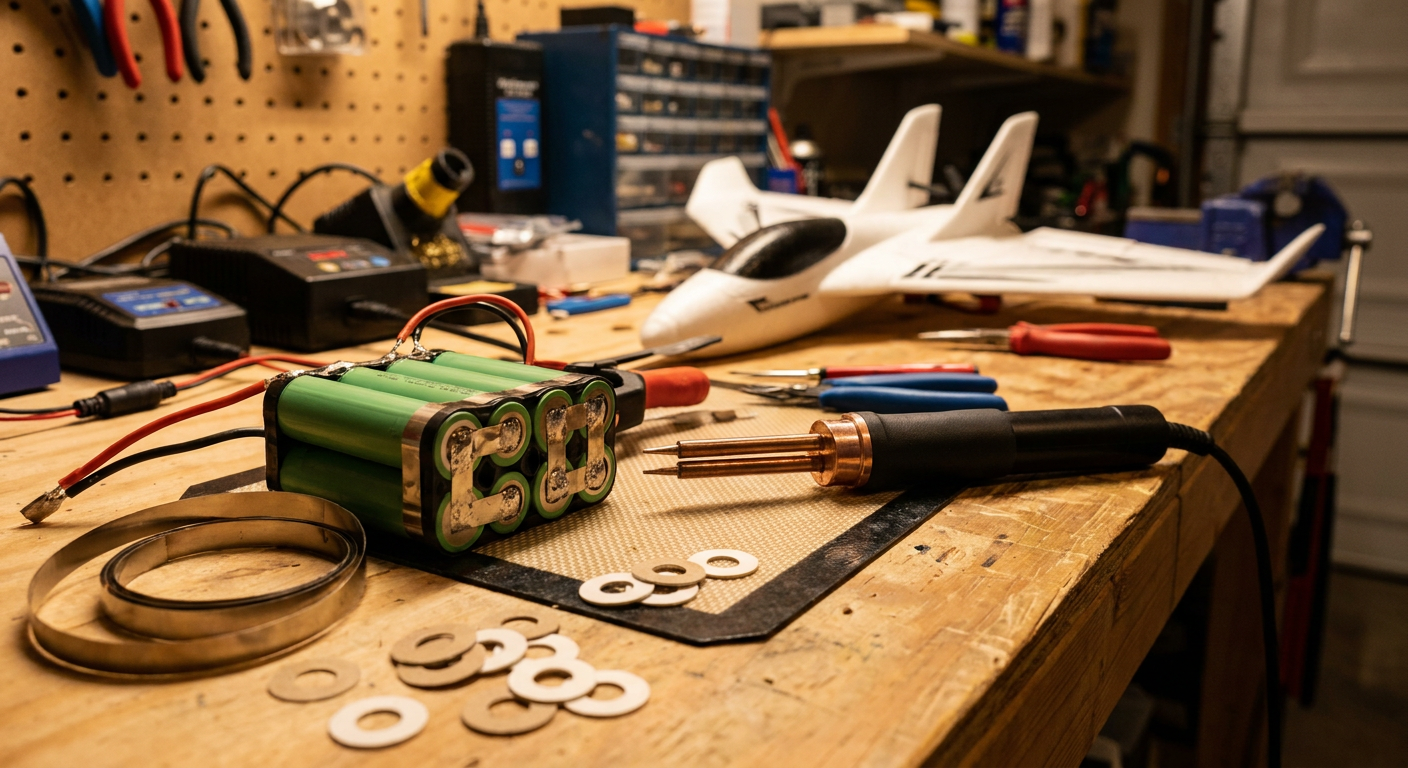
Last weekend at the local field, one of our regular club members brought down a 1.2-meter foam wing after a 52-minute flight. When he pulled the hatch off, the battery bay was barely warm, and his telemetry showed he still had 3.2 volts per cell in the tank. A couple of years ago, getting that kind of airtime meant stuffing a massive, brick-heavy 4S 5000mAh multirotor LiPo into the nose, throwing your center of gravity completely out of balance, and praying the wing wouldn't tip-stall on the landing turn.
That has changed completely thanks to the shift toward cylindrical lithium-ion cells, especially the 21700 format. First came the Samsung 40T, then the Molicel P42A, and recently the Molicel P45B, which quickly became the gold standard for long-range FPV wings and mid-size cruisers. Now, the Molicel P50B has hit retail shelves at roughly $8 to $10 a pop. It claims a full 5000mAh capacity while retaining an absurd continuous discharge capability of 50 to 60 amps.
If you have been sitting on the fence about buying a spot welder and building your own custom packs, or wondering if the new P50B is actually worth the 30% price premium over the battle-tested P45B, here is what we have learned from bench testing, build sessions, and real airtime logs.
The Numbers: P50B Against P45B
On paper, the upgrade seems straightforward. You get 5000mAh of rated capacity in the P50B compared to 4500mAh in the P45B. That is an extra 11% capacity in the exact same physical envelope: 21mm diameter, 70mm length, and roughly 70 grams of weight per cell.
Where the P50B really gets interesting is internal resistance. Molicel used a newer tabless-style internal design and lower-impedance chemistry. That means under heavy load, the cell produces less heat and suffers less voltage sag. When you open the throttle to launch a hand-thrown plane or climb out of a dive, a traditional high-capacity 21700 like the Samsung 50E will sag down to 3.0V almost instantly if you pull 15 amps. The P50B holds its voltage up near 3.6V under that same draw.
Independent lab bench testing from battery testers like Henrik Jensen (lygte-info) and battery builders across the community show that the P50B holds its discharge curve remarkably flat even past 30 amps. At moderate cruising draws of 5 to 10 amps, which is where most 1-meter to 1.5-meter RC planes spend 90% of their flight time, the cell runs stone cold and delivers just under its full rated 5.0Ah.
Is it twice as good as the P45B? No. The P45B is already an exceptional cell that easily handles 40 amps continuous and sells for around $5 to $6 from reputable battery distributors. If you are building a 4S2P or 6S2P pack where the load is split between parallel banks, the current per cell is so low that the lower internal resistance of the P50B makes very little noticeable difference in voltage sag. But if you are building a tight, ultra-compact 4S1P or 6S1P pack for an airframe with limited bay space, that extra 500mAh per cell can mean another 8 to 12 minutes in the air.
Why LiPo Still Loses on Cruise
To understand why everyone is building these packs, you have to look at the energy density math. Standard pouch-cell LiPos are built for burst current. They can dump 70C to 120C without breaking a sweat, which is great if you are flying a 5-inch freestyle quad doing snap rolls or an extreme 3D balsa plane pulling full-throttle hover punch-outs. But for a fixed-wing plane cruising at level flight, high C-ratings are pure wasted weight.
A typical 4S 2200mAh 45C LiPo weighs roughly 240 grams and gives you about 32 watt-hours of energy. A custom-built 4S1P Molicel P50B pack weighs about 295 grams with wire, heat shrink, and connectors, but it delivers roughly 72 watt-hours of usable energy. That is more than double the energy for a penalty of only 55 grams. When you translate that to a plane that pulls 4 amps at 60 km/h, your flight time jumps from 18 minutes to nearly 50 minutes.
There is a trade-off, of course. A 1P 21700 pack will not give you the punch of a LiPo. If you try to pull 80 amps during a vertical rocket climb, the pack will sag hard and you might trigger low-voltage alarms. But for sensible throttle management, a 4S1P or 6S1P setup gives you an airframe that stays light, glides better, lands slower, and stays airborne until your neck gets tired.
The Gear You Need on the Bench
If you want to build these packs, put the soldering iron away from the cell terminals. Soldering directly onto the end caps of high-capacity lithium cells dumps massive heat right into the top seals and the positive PTC safety mechanism, degrading the chemistry and risking an internal short.
You need a decent spot welder. You do not need an industrial $2,000 pneumatic rig, but those cheap $30 relay boards powered by a car battery can be unpredictable, often blowing holes right through the nickel strip into the cell can.
Here is the kit list that actually works on a hobby bench:
- A reliable capacitor-discharge or solid-state battery spot welder. Units like the kWeld, the Sequre SQ-SW2, or the better portable battery-powered welders (like the bifunctional capacitor models) provide clean, adjustable energy pulses in the 30 to 70 Joule range.
- Pure nickel strip. Never use nickel-plated steel. Plated steel has higher resistance, generates unwanted heat during flight, and requires more power to weld. Get 0.15mm thick, 8mm wide pure nickel strip, or slotted strip if your welder is low on punch.
- Barley paper (fishpaper) insulating rings. This is non-negotiable. The positive end of an 18650 or 21700 cell has the positive nub separated from the negative outer casing by a tiny gap beneath the shrink wrap. If the factory wrap wears through under a nickel strip, you get a dead short. Stick an adhesive fishpaper ring on every single positive terminal before you lay down metal.
- Kapton tape and fiberglass filament tape. For structural bundling and high-temperature electrical insulation.
- High-strand silicone wire. 14 AWG or 12 AWG for main leads, and 22 AWG or 24 AWG for standard JST-XH balance leads.
- A good digital multimeter. You must check individual cell voltages before joining anything together.
Step-by-Step: Assembling a 4S1P Pack
Building a pack is not difficult, but it demands patience and clean habits. A short circuit on a 50A cell will instantly vaporize nickel and throw sparks across your workspace.
1. Match and Prep the Cells
Pull your four P50B cells out of the box and check their resting voltage with your multimeter. Fresh cells from good suppliers usually arrive between 3.45V and 3.55V. Ensure all four cells are within 0.02V of each other. If one cell is sitting at 2.9V while the others are at 3.5V, do not build the pack. Balance charge the odd cell on a single-cell cradle first to match the rest.
Clean the positive and negative terminals with a quick wipe of isopropyl alcohol to remove manufacturing oils. Stick adhesive barley paper rings over the positive tops.
2. Arrange the Layout
For a slim 4S1P pack that slides easily into a fuselage, arrange the cells side-by-side in an alternating series pattern: Positive-Negative-Positive-Negative. Use a strip of thin double-sided foam tape or Kapton tape between the cell bodies so they do not rub against each other under flight vibrations.
3. Dial in the Welder Settings
Before you weld your actual cells, take a spare piece of nickel strip and a dead or dummy battery to run test welds. For 0.15mm pure nickel, a weld energy between 35 and 45 Joules is usually the sweet spot on a capacitor welder.
Test the weld strength: try to pull the nickel off with needle-nose pliers. A good weld will tear small circular holes out of the nickel strip, leaving the weld nuggets firmly bonded to the can. If the nickel peels off clean with zero tearing, your energy is too low. If you blow a dark spark and leave a burnt pit in the cell metal, your energy is too high or your probe pressure was uneven.
Press down firmly with both copper probes, keeping them about 2mm to 3mm apart. Avoid overlapping previous weld spots.
4. Making the Series Connections
Cut your nickel strips to length with rounded corners. Sharp square corners on nickel strip can pierce through outer shrink wrap over time.
Lay the nickel strip across the positive terminal of Cell 1 and the negative terminal of Cell 2. Place four to six solid spot welds on each terminal. Repeat for the link between Cell 2 and Cell 3, and Cell 3 and Cell 4. This leaves you with an exposed positive terminal on Cell 1 and an exposed negative terminal on Cell 4 for your main discharge leads.
5. Soldering the Discharge and Balance Leads
Here is a crucial trick: never solder your thick 12 AWG silicone wire directly on top of the cell cap while it is attached to the cell. The heat required to tin heavy wire will cook the cell underneath.
Instead, cut your positive and negative terminal nickel tabs slightly long. Solder your red and black silicone wires onto those nickel tabs on the bench away from the battery, tin them thoroughly, let them cool completely, and then spot-weld the pre-soldered nickel tabs onto the end caps.
For the JST-XH balance leads, solder the individual wires (Ground, Cell 1, Cell 2, Cell 3, Cell 4) directly onto the center of the series nickel bridge strips. These thin 24 AWG wires take only a split-second touch of a hot iron to bond cleanly without transferring significant heat into the cells.
6. Wrapping and Mechanical Protection
Once all wires are secured and you have verified every cell pin on your balance lead with a battery checker, wrap the pack tightly in Kapton tape. Follow that with two wraps of cross-weave fiberglass filament tape to give the pack rigid structural strength so it cannot flex during hard pulls or rough landings.
Slide the assembly into a length of 70mm or 85mm PVC battery heat shrink tubing and shrink it down with a heat gun on medium heat, moving quickly so you do not soak heat into the cells.
Flight Controller and ESC Configuration
Once your pack is built, you cannot treat it like a LiPo in your avionics setup. If you leave your flight controller or ESC on standard LiPo settings, you will run into issues.
Change the Low Voltage Cutoff (LVC)
Most standalone RC speed controllers (like standard hobbywing or generic ESCs) have a default low-voltage protection set at 3.3V or 3.2V per cell. If you hit that voltage on a LiPo, you have less than 5% capacity left and the battery is dying.
A Molicel P50B, however, is designed to be discharged down to 2.5V per cell under manufacturer specs. In real flight, we rarely pull them below 2.8V under load, which leaves resting voltage around 3.0V to 3.1V on the ground. If your ESC has an aggressive low-voltage cutoff, it will pulse the motor or kill the throttle right when your pack still has 20% to 25% of its flight time remaining. Go into your ESC settings and disable LVC entirely, or set it to the lowest possible non-critical cutoff (NIMH mode or custom 2.6V).
Calibrate Your Current Sensor
Because Li-ion discharge curves are much flatter through the middle and slope smoothly down all the way to 3.0V, voltage is a decent indicator of state of charge, but consumed milliamp-hours (mAh) is much more reliable. In INAV, ArduPilot, or your custom telemetry scripts, run a test flight and measure how many mAh your smart charger puts back into the pack versus what your OSD showed. Adjust your current sensor scale until the two numbers match within 2%.
If you use flight planning tools or telemetry platforms like those being built around MyRC to map out long autonomous waypoint lines, accurate pack capacity scaling ensures your return-to-home fail-safes trigger based on actual remaining watt-hours rather than generic LiPo curves.
Real Flight Log: 4S1P P50B on a 1000mm Flying Wing
To see how the P50B behaves compared to the P45B and standard LiPos, we ran back-to-back tests in a standard 1000mm EPP flying wing powered by a 2207 1800KV motor turning a 7x5 APC prop.
Here is how the data shook out on typical mid-afternoon cruise runs:
| Battery Configuration | Pack Weight | Usable Capacity (to 3.0V) | Average Cruise Speed | Cruise Current Draw | Total Air Time |
|---|---|---|---|---|---|
| 4S 2200mAh 70C LiPo | 245g | 1,950 mAh | 62 km/h | 4.8 A | 24 minutes |
| 4S 3300mAh 35C LiPo | 365g | 2,900 mAh | 66 km/h (heavy) | 5.6 A | 31 minutes |
| 4S1P Molicel P45B 4500mAh | 295g | 4,200 mAh | 63 km/h | 4.9 A | 51 minutes |
| 4S1P Molicel P50B 5000mAh | 298g | 4,780 mAh | 63 km/h | 4.9 A | 58 minutes |
The P50B yielded an extra seven minutes of flight time over the P45B under identical cruising conditions. More importantly, during a simulated climb out at 22 amps of throttle, the P50B pack held 13.8 volts (3.45V per cell) compared to 13.3 volts (3.32V per cell) on the P45B. That extra voltage gives you a noticeable increase in motor authority when you need to power out of a steep sink rate or punch through headwind.
When we pulled the P50B pack out of the fuselage immediately after landing, an infrared thermometer read 38 degrees Celsius in an ambient air temp of 26 degrees Celsius. That is barely warm to the touch, proving that a 5A to 10A flight profile puts almost no thermal strain on these cells.
When Is the P50B Overkill?
Despite the great performance, you should not automatically buy P50Bs for every build on your bench.
First, if you are building parallel packs, like a 4S2P (10,000mAh) or 6S2P setup for a big twin-motor cargo plane or a long-endurance mapper, the current draw per cell drops below 3 to 5 amps even at climb. At those low discharge rates, standard cells like the Samsung 50S or even the cheaper P45B perform almost identically in usable watt-hours, and you will save $30 to $50 on cell costs across the pack.
Second, beware of where you buy them. Because the P50B is currently one of the most talked-about cells in the flashlight, e-skate, and RC communities, questionable third-party sellers on online marketplaces have started rewrapping lower-tier 4000mAh or recycled industrial cells with counterfeit Molicel sleeves. Always buy from authorized distributors who test their batches, such as 18650 Battery Store, IMR Batteries, Nkon in Europe, or Fogstar in the UK.
Check the laser-etched matrix code on the steel can beneath the top wrap, verify the clean, crisp font on the outer sleeve, and weigh each cell on a precision scale before building. A genuine P50B weighs between 69 and 71 grams.
What to Try Next
If you fly fixed wings, gliders, or long-range camera rigs, building a 4S1P or 6S1P pack is one of the most rewarding weekend workshop projects you can tackle. It frees you from the constant anxiety of watching your battery voltage sag after three aggressive turns, and it changes how you plan your flying sessions.
Start small. Grab four genuine P45B or P50B cells, get yourself a proper capacitor welder, practice your weld pulls on scrap nickel, and take your time insulating the positive caps with fishpaper. Once you see your timer pass 45 minutes on a plane that used to land in 15, you will rarely reach for a heavy pouch LiPo for cruising flights again.
Sources
- https://www.molicel.com/inr-21700-p50b/
- https://lygte-info.dk
- https://www.aboutenergy.io/post/molicel-p50b-vs-p45b-battery-performance
- https://www.18650batterystore.com/products/molicel-21700-p50b-5000mah-50a-battery
- https://imrbatteries.com/products/molicel-21700-p50b-5000mah-60a-battery
- https://forum.esk8.news/t/molicel-inr-21700-p50b/81162
- https://endless-sphere.com