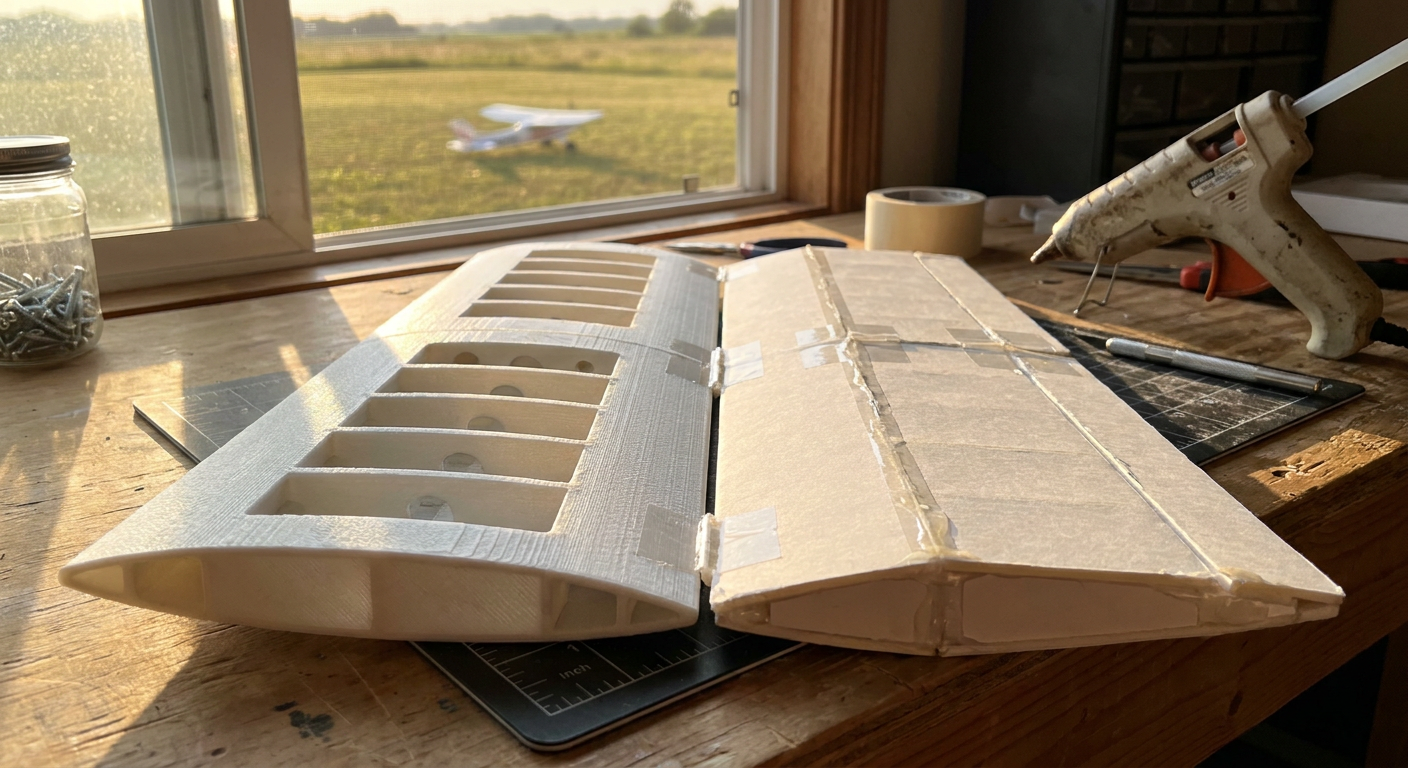
Every flying club has that moment in late spring when someone walks up to the flight line carrying a pristine, matte-white scale model that looks like it rolled out of a composite fabrication shop. Ten years ago, that silhouette meant either two hundred hours over balsa plans or a thousand-dollar molded fiberglass kit. Today, it usually means a spool of active-foaming lightweight PLA running through a consumer 3D printer for three days straight.
Active foaming filaments from manufacturers like ColorFabb and eSun have completely changed the math on printed aircraft. Standard PLA produces heavy, brittle bricks that stall fast and shatter on contact with anything stiffer than manicured putting greens. Foaming LW-PLA cuts that weight almost in half by using chemical blowing agents that expand inside the hotend. Suddenly, designs from outfits like 3DLabPrint, Eclipson, and Planeprint can match the wing loading of traditional foamies.
Yet walk over to the repair bench behind the pits after an afternoon of flying off an unkept grass field, and you will see a very different picture. The guys flying dollar-store foam board scratch builds are swapping batteries and taping over nose dings. The guys flying printed scale warbirds are sweeping up eggshell-thin plastic shards from the runway.
Before spending thirty-five to fifty dollars on a spool of specialty foaming filament and dedicating fifty hours of printer runtime to your next airframe, you need to understand where LW-PLA shines, where it falls apart, and why cheap paper-faced foam sheets still hold their ground on rough grass.
How Active Foaming Filament Changes the Weight Math
Standard PLA has a density of roughly 1.24 grams per cubic centimeter. If you print an 800 mm wingspan park flyer with standard PLA, you end up with a flying brick. The model needs a high landing speed, stalls without warning, and punches through its own motor mount on every rough arrival.
Active foaming lightweight PLA fixes this problem through chemistry. The filament ships in an unexpanded state. Once it enters your printer hotend and crosses roughly 215 degrees Celsius, an integrated blowing agent begins decomposing and releasing gas. Tiny, uniform bubbles form within the molten plastic as it leaves the nozzle.
By dialing the hotend up between 235 and 250 degrees Celsius, the plastic expands to more than double its original volume. Because the bead coming out of your 0.4 mm nozzle is now mostly microcellular foam, you can drop your slicer extrusion flow rate down to 40 or 50 percent while maintaining the same outer shell wall thickness.
Unfoamed Filament (100% flow @ 200°C) -> Normal density (~1.24 g/cm³)
Foamed Filament   (45% flow @ 245°C) -> Expanded density (~0.55 g/cm³)
The result is a single-wall airframe structure that drops weight right into the territory of extruded polystyrene (XPS) and expanded polypropylene (EPP) sheets. A typical single-engine warbird fuselage that would weigh 450 grams in regular PLA drops down to 210 grams in fully foamed LW-PLA. That changes everything for wing loading, glide ratio, and slow-flight handling.
The Real Mechanical Trade-Off: Density Versus Layer Adhesion
There is no free lunch in material physics. When you cut the density of PLA by packing it with gas pockets and cutting your material flow by more than half, you pay a steep price in mechanical strength.
Independent testing by Stefan Herrmann at CNC Kitchen showed exactly how severe this trade-off is. While unfoamed LW-PLA printed at low temperatures maintains decent tensile strength, ramping up the temperature to achieve full lightweight foaming causes interlayer bonding strength to crater.
Material Performance Comparison
The following data summarizes physical test measurements across standard PLA, foamed LW-PLA at various temperatures, and Adams paper-faced foam board.
| Material / State | Hotend Temp | Flow Rate | Density | Tensile Layer Adhesion | Relative Impact Toughness |
|---|---|---|---|---|---|
| Standard PLA | 205°C | 100% | ~1.24 g/cm³ | ~35.0 MPa | High (Brittle failure) |
| LW-PLA (Unfoamed) | 200°C | 100% | ~1.20 g/cm³ | ~22.5 MPa | Moderate |
| LW-PLA (Partial Foam) | 225°C | 65% | ~0.80 g/cm³ | ~13.0 MPa | Low-Moderate |
| LW-PLA (Max Foam) | 245°C | 44% | ~0.55 g/cm³ | ~4.3 MPa | Very Low (Delaminates) |
| Adams Foam Board (Paper On) | N/A | N/A | ~0.48 g/cm³ | N/A | High (Bends and creases) |
| Adams Foam Board (Paper Off) | N/A | N/A | ~0.03 g/cm³ (core) | N/A | Moderate (Compresses) |
Data note: LW-PLA tensile and layer adhesion figures are derived from CNC Kitchen mechanical test benches on ColorFabb LW-PLA. Foam board figures represent standard 5 mm Adams foam sheet averages.
When your material layer adhesion drops from 22 MPa down to 4.3 MPa, your printed airframe stops behaving like a continuous plastic shell. It behaves like structured, brittle dried foam. In straight-line flight, an internal rib grid easily handles aerodynamic G-loads. But torsion, ground strikes, and high-frequency vibrations attack the exact orientation where 3D prints are weakest: the horizontal layer lines.
Dialing In Your Slicer: The Zero-Retraction Rule
Printing foaming PLA requires throwing out almost everything you know about standard PLA profiles.
Because the blowing agent reacts to heat continuously inside the nozzle, you cannot stop the flow of plastic by simply retracting the filament. If your extruder pulls back 2 mm, the pressurized gas in the melt zone keeps bubbling out of the nozzle tip anyway. Retraction creates air voids inside the hotend, causing severe under-extrusion when the extruder resumes, while doing almost nothing to prevent stringing on travel moves.
To get clean, flight-ready airframe parts, follow these baseline slicer rules:
- Turn Off Retraction Entirely: Set retraction distance to 0 mm. Accept that you will have internal stringing inside the wing cavities. Internal strings weigh fractions of a gram and add tiny amounts of shear support; external travel strings can be wiped off with a light pass from a heat gun or 400-grit sandpaper.
- Set Wall Line Count to Exactly One: Modern printable plane files are engineered around a single continuous perimeter wall (typically 0.4 mm to 0.45 mm wide). Slicing with multiple perimeters will double your structural weight and defeat the entire purpose of buying foaming filament.
- Dial in Flow by Weight, Not Calipers: Because foaming plastic expands unevenly outside the nozzle, measuring wall thickness with digital calipers is notoriously inaccurate. Instead, slice a 100 mm test cube in vase mode, calculate the theoretical weight based on volume, and adjust your flow multiplier until the printed part matches 44 to 48 percent of the unfoamed model weight.
- Keep Travel Moves Inside the Structure: Enable slicer options like 'Combing Mode' or 'Avoid Crossing Perimeters'. Keeping the oozing nozzle tip inside the wing envelope keeps the outside surface smooth and aerodynamically clean.
- Drop Print Speeds: Print between 35 mm/s and 50 mm/s. Fast movement rates cause inconsistent heat transfer in the hotend melt zone, which creates bands of dense, unfoamed plastic followed by over-expanded, brittle sections.
Slicer Configuration Baseline for LW-PLA:
- Nozzle Temperature: 240°C - 245°C
- Heated Bed: 50°C (with glue stick or PEI sheet)
- Extrusion Multiplier / Flow: 0.42 - 0.46
- Retraction Distance: 0.0 mm
- Print Speed: 40 mm/s
- Cooling Fan: Off or 10% maximum
The Rough Grass Test: What Happens on Real Club Runways
If your local field has a pristine 300-foot paved asphalt strip or a putting-green turf runway manicured twice a week, an LW-PLA airframe is an absolute joy. It flies on rails, tracks through axial rolls cleanly, and presents an authentic scale outline without the chunky square edges of flat foam board.
Most hobbyists do not fly on manicured turf. They fly in public parks, farm fields, and suburban club patches where the grass is three inches high, clumpy, and full of hidden weed stalks.
Here is how both construction methods hold up to common flight line mishaps.
The Tip-Catch Cartwheel
You bring the model in for a greased landing, but a gust catches one wing. The wingtip drops, snags a clump of tall fescue grass, and ground-loops the plane at fifteen miles per hour.
- Dollar Foam Board: The foam wingtip compresses slightly. The paper skin might develop a diagonal crease across the outer third of the panel. You pick up the plane, bend the foam back straight by hand, add a strip of two-inch clear packing tape over the crease, and you are back in the air on the next battery pack.
- Foaming LW-PLA: The sudden torsional load hits the single-wall skin perpendicular to the print bed layer lines. The wing panel snaps cleanly along three layer seams. Internal alignment tabs crack off inside the center section. The plane is done for the day; repairing it requires either slicing and printing a whole new 7-hour outboard wing section or drowning the jagged fracture in medium CA glue and kicker, which adds dead weight right at the wingtip where you least want it.
The Nose-Over Belly Landing
Belly-landing an unpowered model onto rough grass frequently catches the chin cowl or propeller, flipping the model onto its back.
- Dollar Foam Board: The hot-glued motor firewall might pop free from the foam fuselage tabs if the impact is violent. Five minutes with a 12-volt field glue gun or a bead of Quick-Cure 5-minute epoxy reseats the firewall, and the flexible paper-foam sandwich absorbs the rest of the shock.
- Foaming LW-PLA: Thin printed motor mounts tend to shatter along layer lines directly behind the screw bosses. Because the plastic cannot stretch or deform elastically, the shock transmits down the fuselage, frequently popping internal stringers and cracking the canopy deck.
Field Repair Reality Check:

Dollar Foam Board: Creases -> Straighten by hand -> Clear packing tape -> Fly again
LW-PLA Airframe:    Cracks along layer lines -> CA glue/Kicker -> Structural weight penalty or reprint
The Hot Car Boot Disaster: Thermal Sag
There is an environmental vulnerability unique to PLA that every weekend flyer discovers sooner or later: glass transition temperature.
Standard and lightweight PLA begin softening at roughly 55 to 60 degrees Celsius (131 to 140 degrees Fahrenheit). On an eighty-degree summer afternoon, the interior of a parked car or closed hatchback parked in the sun easily climbs past 60 degrees Celsius within forty-five minutes.
If you leave a dollar-foam plane in a hot car trunk, the worst that happens is the hot glue joints might get slightly gummy, or the paper covering may bubble if humidity is high. The underlying XPS foam core remains structurally rigid up past 80 degrees Celsius.
If you leave an LW-PLA printed aircraft in a hot car boot under the same conditions, you will return to find a modern art sculpture. Because single-wall printed parts carry residual internal stress from the extrusion process, thin wing skins sag between internal ribs, control surfaces warp into permanent high-drag curls, and the fuselage develops an unrecoverable banana bend. Once an expanded PLA wing warps from ambient cabin heat, you cannot iron or heat-gun it back to true alignment. The airframe is scrap.
If you fly in warm climates, storing and transporting printed planes demands strict discipline. They must stay in the air-conditioned cabin during the drive and sit under a shade tent or in deep tree cover at the field.
Build Bench Economics: Spool Costs vs. Box Cutters
Advocates of 3D printed planes often claim printing saves time and money. That claim depends entirely on how you value printer hours versus hands-on bench hours.
Let us look at what it actually takes to build a standard 1000 mm park flyer using both approaches.
Option A: The Dollar Foam Board Scratch Build
- Raw Materials: Three sheets of Adams 20x30 foam board ($3.75), one roll of reinforced packing tape ($4.00), hot glue sticks ($2.00), two 1.5 mm carbon fiber rods or wooden BBQ skewers ($3.00).
- Total Material Cost: ~$12.75.
- Bench Time: Three to four hours of cutting, folding, and gluing from paper plans or a laser/needle-cutter kit.
- Tooling: A steel ruler, an X-Acto knife, a cutting mat, and a glue gun.
Option B: The Foaming LW-PLA Airframe
- Raw Materials: Roughly 450 to 550 grams of active-foaming filament (half to two-thirds of a $35–$45 spool, e.g., ColorFabb LW-PLA or eSun eLW-PLA), one bottle of medium CA glue and activator ($12.00), 4 mm carbon fiber main spar ($4.50).
- Total Material Cost: ~$35.00 to $42.00.
- Bench Time: Thirty to fifty hours of active 3D printer runtime, plus two to three hours of deburring, trimming stringing, aligning internal carbon spars, and gluing interlocking fuselage and wing segments.
- Tooling: A calibrated 3D printer with a reliable hotend, PEI bed, slicer tuning time, and digital scales.
Printing an airframe does not eliminate build effort. It shifts the labor from manual craft to digital calibration and machine maintenance. If you love tinkering with slicer settings, tuning Z-offset, and watching parts emerge layer-by-layer on the build plate, the process is deeply rewarding. But if your goal is getting an airframe into the air by Saturday morning after a crash on Thursday night, an evening with foam board and a hot glue gun wins every time.
What This Means for MyRC
Practical RC flying is always about choosing the right construction method for your specific field conditions, available budget, and personal build style. Tools like MyRC (myrc.ai) focus on grounding aircraft selection, power system tuning, and airframe design in real-world flying experience rather than forum hype.
Whether you are sizing a brushless powertrain for a scratch-built foam delta or checking wing loadings on a lightweight printed scale twin, the best aircraft is always the one that gets you back into the air with minimal friction when a landing does not go quite as planned.
The Direct Flight-Line Decision: Which Should You Build?
To pick the right material for your next project, use this direct decision frame:
- Choose Foaming LW-PLA if: You are building complex scale outlines (warbirds, EDF jets, vintage curved fuselages) where flat foam looks boxy and unnatural; you fly off smooth grass, geotextile runways, or tarmac; you have a reliable, well-tuned 3D printer; and you want precise aerodynamic airfoil reproduction straight from a CAD model without hand-sanding balsa or shaping foam blanks.
- Choose Dollar Foam Board if: You are building daily sport beaters, trainers, combat wings, or experimental prototypes; you fly off rough farm fields, tall brush, or rocky soil; you want airframes you can crash, repair in five minutes with packing tape, and replace for less than the cost of a fast-food lunch; or you live in high-heat regions where models spend hours in hot vehicles.
Quick Summary: Foam Board vs. Foaming LW-PLA
           Feature | Adams Foam Board        | Foaming LW-PLA
-------------------|-------------------------|---------------------------
     Material Cost | ~$1.25 - $3.75 / plane  | ~$25.00 - $40.00 / plane
    Build/Run Time | 3 to 4 hours bench work | 30 to 50 hours print time
Scale Reproduction | Blocky, square edges    | Precise CAD curves
Crash Repairability| Tape and hot glue       | Brittle fracture / Reprint
   Heat Resistance | Stable up to ~80°C      | Warps above ~55°C (in car)
Best Flight Field  | Any open rough ground   | Cut turf, tarmac, geotextile
Direct Q&A: LW-PLA on the Flight Line
Q: Can I use regular CA glue on foaming LW-PLA, or does it dissolve the plastic like standard foam? A: Standard cyanoacrylate (CA) glue and quick-curing accelerator will not melt or dissolve LW-PLA. Unlike polystyrene foam sheets that require foam-safe odorless CA or hot glue, LW-PLA is chemically identical to standard PLA polyester. You can use regular thin or medium CA, five-minute epoxy, or polyurethane glues without damaging the printed skin.
Q: Does pre-foamed lightweight PLA behave the same as active foaming PLA? A: No. Pre-foamed filaments (like Polymaker PolyLite LW-PLA) are foamed during factory production, meaning they do not expand in your hotend. You print them with standard 100% flow settings at normal temperatures (around 200°C to 215°C). They eliminate stringing and messy temperature calibration, but they do not achieve the ultra-low 0.5 g/cm³ densities possible with active foaming filaments like ColorFabb LW-PLA or eSun eLW-PLA.
What to Watch on Your Bench This Weekend
If you decide to print your first LW-PLA airframe this season, start small. Do not begin with a twelve-piece twin-engine scale warbird.
Download a small, single-motor flying wing or a sub-800 mm hand-launcher from designers who release dedicated test cubes with their models. Spend a Saturday afternoon printing single-wall vase cubes across a temperature ladder from 220 to 250 degrees Celsius at five-degree increments. Weigh each cube on a precision gram scale, inspect the layer bonding by trying to rip the seam with your fingernails, and find the exact sweet spot where your specific hotend achieves maximum volume expansion without turning the wall into structural rice paper.
Keep a roll of packing tape and a box of dollar foam sheets under your workbench anyway. When the wind picks up and the grass at the club field is knee-high, you will be glad you have a five-dollar backup plane in the back of the car.
Sources
- ColorFabb LW-PLA Product Specifications and Printing Guidelines
- CNC Kitchen: ColorFabb LW-PLA Material Benchmarks and Layer Adhesion Testing
- 3DLabPrint: 3D Printed RC Aircraft Design Archives
- Eclipson Airplanes: Lightweight 3D Printed Aircraft Engineering
- Planeprint: Printable RC Aircraft Systems and Flight Design
- Flightory: Lightweight PLA Filament Printing and Drying Guidelines