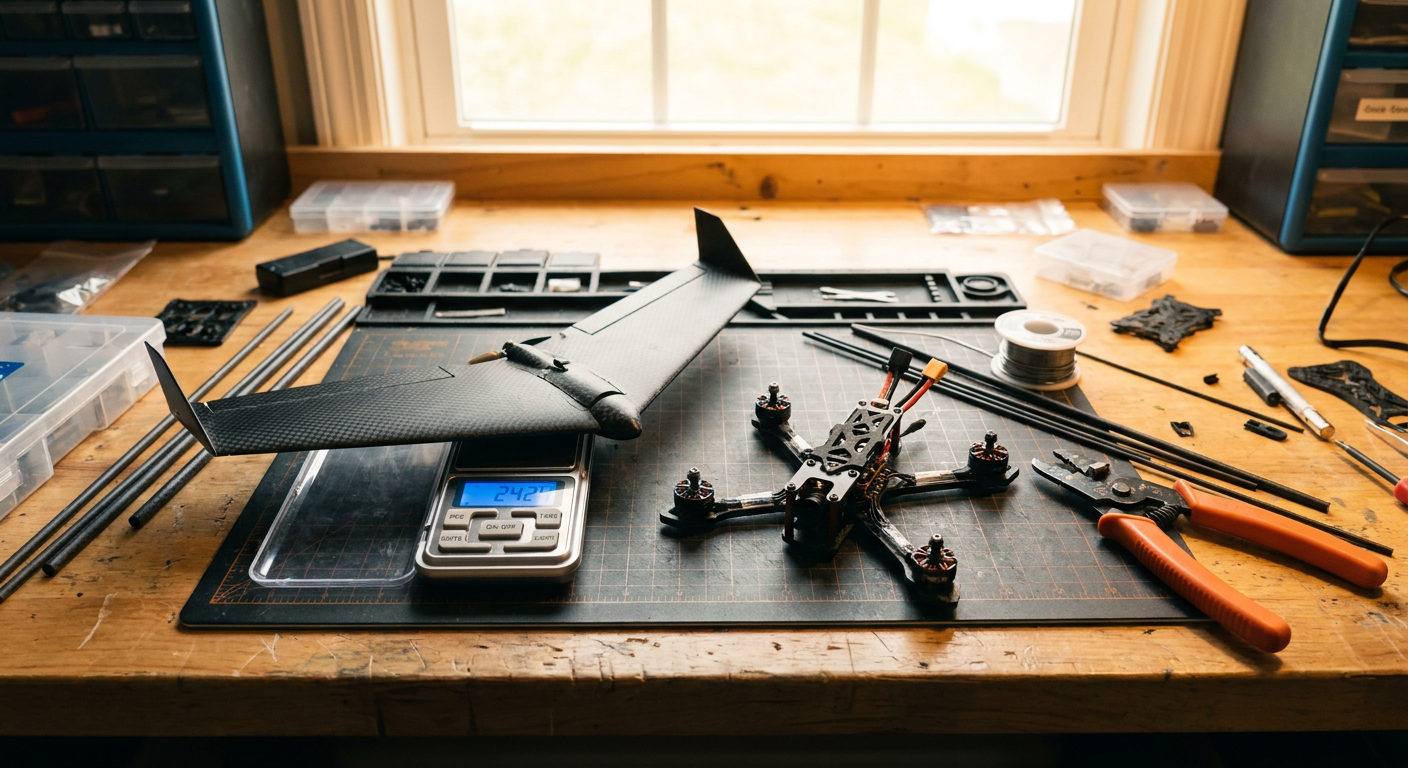
The Federal Aviation Administration rules on recreational flying under 0.55 pounds (249 grams) have remained the cleanest boundary line in the hobby. If your model takes off at 250.0 grams or more, you must register it through FAADroneZone for five dollars, stick an registration number on the outside, and carry an active Remote ID broadcast module unless you are flying strictly inside an FAA-recognized identification area (FRIA). If your aircraft lifts off at 249.0 grams or less, you only need to pass the free online TRUST test and follow community safety guidelines. You do not need to buy an eighty-dollar standalone broadcast module, and you do not need to strap extra electronics to your airframe.
That ten-gram buffer between 240 grams and 250 grams is where most weekend builds win or lose. A bare 3-inch carbon quad frame or a 600mm molded EPP foam wing usually looks safely light when you unbox it. The kit says 120 grams empty, and a small 3S 450mAh LiPo weighs around 45 grams. You figure you have plenty of room to spare. Then you add an FPV camera, an analog or digital video transmitter, an ExpressLRS receiver, a battery strap, heavy motor wires, four steel screws too many, and a thick 3D-printed nose cone. When you finally sit the finished aircraft on your digital kitchen scale, the display blinks 262 grams.
Now you are over the limit. You either rebuild the model, register it and mount a broadcast beacon, or pack up your gear and stick to an official club field. You do not need to settle for an overweight build. Shedding fifteen to twenty grams without hurting structural strength or cutting flight time comes down to four specific areas: wiring harnesses, 3D-printed mounts, mechanical hardware, and battery cell chemistry.
The Real Penalty of Wire Weight and Solder Blobs
Copper is heavy. Silicone insulation is also surprisingly heavy. When you build a standard 5-inch quad or a 1-meter park flyer, running 16 AWG power leads and leaving three inches of slack on your ESC wires does not register as a problem. On a sub-250g machine, wiring harness bulk can easily eat four to seven grams of your total weight budget.
Consider your main battery pigtail. A six-inch run of 14 AWG silicone wire with an XT60 connector weighs around 14 grams. If your setup draws a maximum burst current of 25 amps, you do not need 14 AWG wire or an XT60 plug. Dropping down to an XT30 connector with three inches of 18 AWG or 20 AWG silicone wire cuts the pigtail weight to roughly 4.5 grams. That single swap shaves almost ten grams from the tail or belly of your model.
Motor wires tell the exact same story. Trimming your motor leads so they sit flush against the 4-in-1 ESC or wing power board saves another gram per motor. Avoid joining wires with bullet connectors or heavy heat shrink wrap. Solder the enamelled motor windings or flexible leads directly to the solder pads on your flight controller or speed controller. Clean, direct joints save weight and eliminate loose mechanical contact points that cause mid-air brownouts.
Excess solder is another silent culprit. A heavy-handed solder job across an all-in-one flight controller board can add two full grams of lead-tin alloy. Keep your iron at proper temperature (around 350 to 380 degrees Celsius), tin your pads cleanly, use quality flux, and do not leave giant globes of solder on ground pads.
Rethinking 3D Printed TPU and PLA Parts
Direct 3D printing revolutionized scratch building and FPV micro wings. It also ruined thousands of weight budgets. TPU (thermoplastic polyurethane) is tough, vibration-resistant, and flexible, which makes it the standard choice for action camera mounts, antenna holders, and wing tip skids. It is also dense, with a specific gravity around 1.2 grams per cubic centimeter.
A standard solid TPU mount for a micro camera or an antenna stack can easily weigh 8 to 12 grams if sliced with default slicer profiles. That is five percent of your entire legal weight allowance spent on a piece of plastic holding a 4-gram camera.
To strip weight out of printed parts:
- Drop your infill to 10 or 15 percent and switch to a gyroid infill pattern. Gyroid infill distributes stress evenly in all directions while leaving huge internal air pockets.
- Cut your wall line count from four perimeters down to two, and reduce top and bottom solid layers to three.
- Model cutouts and skeleton frames into the part design. If a wall is not directly taking landing impact or motor torque, remove the material in CAD.
- Use LW-PLA (foaming lightweight PLA) for non-impact fairings, motor nacelles, and battery bay hatches. Active foaming LW-PLA drops density by roughly 50 percent compared to standard PLA, giving you rigid parts at half the mass of TPU.
- Use bare foam cutouts instead of printed trays. When building an EPP micro wing, you do not need a 10-gram printed electronics box. Use a hot soldering iron or a sharp hobby knife to carve cavities directly into the foam wing core. The EPP foam itself provides excellent vibration dampening and crash protection at zero added mass.
Hardware Audits: Steel, Titanium, and Nylon
Take a close look at the hardware holding your model together. A typical 3-inch carbon frame uses sixteen M2x6mm steel screws for the four motors, four to eight M2x20mm steel screws for the standoff stack, and aluminum standoffs between the plates.
Steel screws weigh roughly 0.45 grams each for an M2x6mm size. Sixteen motor screws equal 7.2 grams. Switching those sixteen motor screws to grade 5 titanium cuts their weight down to 4.1 grams. If you switch to high-tensile 7075 aluminum screws on low-stress components (like top plate mounting and antenna brackets), you drop down to roughly 0.15 grams per screw.
Nylon hardware is even lighter. While you should never use nylon screws to mount brushless motors, nylon M2 and M3 hardware works well for mounting flight controllers, receivers, and VTX boards. A stack of four nylon standoffs with nylon nuts weighs less than 0.8 grams, compared to 3.5 grams for steel and brass alternatives. Over the whole airframe, an aggressive fastener swap routinely takes off four to six grams.
Battery Strategies: LiPo vs 18650 Li-Ion
Batteries represent roughly 35 to 55 percent of your all-up flying weight (AUW). Getting your battery choice right decides whether your model flies for four minutes, eight minutes, or thirty minutes while staying under 249 grams.
For 3-inch freestyle and fast micro wings, high-discharge LiPo packs remain the best choice. Standard 3S and 4S LiPo packs between 450mAh and 650mAh give you the high amp burst capability needed to pull out of dives and punch through wind gusts without voltage sag.
| Pack Configuration | Cell Type | Nominal Capacity | Typical Pack Mass | Best Use Case |
|---|---|---|---|---|
| 3S 450mAh 75C | LiPo (Pouch) | 450 mAh | 42 - 46 g | 3-inch micro quad freestyle, agile micro wing |
| 4S 550mAh 90C | LiPo (Pouch) | 550 mAh | 62 - 68 g | High-power micro wing racing, fast 3-inch quads |
| 2S 18650 (Sony VTC6) | Li-Ion (Cylindrical) | 3000 mAh | 98 - 104 g | Long-range micro cruiser wing (25-40 min flights) |
| 2S 18350 (KeepPower) | Li-Ion (Cylindrical) | 1100 mAh | 46 - 52 g | Lightweight micro endurance wing |
| 1S 650mAh (Folded Cell) | LiPo (Pouch) | 650 mAh | 14 - 16 g | Ultra-light sub-100g indoor and yard flyers |
Source: Illustrative composite compiled from typical commercially available retail packs (Tattu, GNB, Sony/Murata, KeepPower) using digital scale bench measurements.
Notice the stark difference in the table above between LiPo and Li-Ion. A 2S 18650 pack built from quality 3000mAh cells (like the Murata VTC6 or Samsung 30Q) weighs right around 100 grams with wire and heat shrink. If you install that pack into a lightweight micro wing, your entire bare airframe, motor, servos, flight controller, and FPV gear cannot exceed 148 grams.
If you build the airframe carefully, a 145-gram dry wing carrying a 100-gram 2S Li-Ion pack lands at 245 grams total takeoff weight. That setup can cruise at 45 km/h while pulling less than 3 amps, yielding genuine 35-minute flight times without triggering FAA registration or Remote ID requirements.
If you use high-capacity LiPo packs instead, pay attention to the manufacturer packaging. Many retail LiPo packs come with thick plastic end-caps, heavy heat shrink, and 12 AWG silicone leads with bulky connectors. Stripping off hard plastic shells and replacing oversized leads with shorter, lighter wires can save five grams per pack without altering the cells inside.
Wing Skinning, Glue, and Servo Selection
For fixed-wing builders, foam construction choices make or break the scale reading. Hot melt glue is convenient, but it is one of the heaviest adhesives in the workshop. A full hot glue build on a 600mm foam wing adds between 12 and 18 grams of rubbery dead weight. Switching to thin medium cyanoacrylate (CA) with foam-safe kicker, or using contact cement like UHU Por or Welder applied in thin coats, cuts your adhesive weight down to three or four grams across the entire airframe.
Laminating film is another area where builders accidentally overbuild. Applying 5-mil (125-micron) heavy laminate makes a micro wing stiff and nearly indestructible, but it adds substantial mass to the outer wing panels where you least want it. For sub-250g wings, 1.5-mil (38-micron) or 3-mil (75-micron) new-style laminating film provides sufficient torsional stiffness and surface protection at less than half the weight of 5-mil film.
Servo sizing also deserves a critical look. Many kits recommend standard 9-gram servos (like the TowerPro SG90 or Emax ES08MDII). Two 9-gram servos, complete with lead wires and mounting brackets, weigh around 22 grams. On a sub-250g micro wing flying under 90 km/h, aerodynamic surface loads on small elevons are modest. Switching to quality 4.3-gram or 5-gram metal or nylon-gear micro servos (such as the Emax ES9051 or similar micro digital servos) saves ten grams across the pair while delivering all the control authority and centering precision needed for stable flight.
Component Weight Audit: The Gram-Diet Breakdown
To see how these small adjustments add up, look at the component mass comparison below. This composite breakdown shows a typical 3-inch FPV quad build before and after applying strict weight-saving rules.
| Component | Standard Build Mass | Gram-Optimized Build Mass | Weight Saved |
|---|---|---|---|
| 3-inch Carbon Frame | 38.0 g (steel hardware, TPU guards) | 26.5 g (titanium screws, no guards) | 11.5 g |
| Motors (4x 1404 / 1504) | 38.0 g (full length leads) | 34.0 g (trimmed leads, no bullets) | 4.0 g |
| AIO FC / ESC Stack | 9.5 g (heavy solder, brass standoffs) | 6.8 g (nylon hardware, direct solder) | 2.7 g |
| FPV Camera + VTX | 14.5 g (thick TPU mount, long antenna) | 8.2 g (minimal mount, dipole antenna) | 6.3 g |
| Battery Lead + Plug | 9.0 g (14 AWG + XT60) | 3.5 g (18 AWG + XT30) | 5.5 g |
| Receiver (ELRS) + Wiring | 3.2 g (heavy sleeve, silicone lead) | 1.1 g (enamelled copper wire, stripped) | 2.1 g |
| Dry Aircraft AUW | 112.2 g | 80.1 g | 32.1 g |
| Battery (4S 550mAh LiPo) | 66.0 g | 64.0 g (trimmed lead) | 2.0 g |
| Total Takeoff Weight | 178.2 g (or 262g with heavy pack) | 144.1 g (leaves 104g for battery) | 34.1 g headroom |
Source: Illustrative composite based on standard market micro components (DarwinFPV, BetaFPV, Flywoo, SpeedyBee) measured on a standard hobby digital scale.
With 34 grams shaved off the dry airframe, you can comfortably run a larger battery pack for longer flight times, or carry an ultra-light HD recording camera (like a stripped RunCam Thumb Pro or Caddx Peanut at roughly 16 to 28 grams) and still sit well under the 249-gram limit.
What This Means for MyRC
Designing micro models that perform well without exceeding legal weight boundaries requires real-world data on actual component masses, wing loading, and motor-prop efficiency. The platform philosophy behind MyRC focuses on practical RC aircraft design grounded in accessible, off-the-shelf hardware and honest field parameters. When you calculate thrust-to-weight ratios, battery capacities, and wing cubic loading before touching a soldering iron or placing a kit order, you eliminate the guesswork that leads to overweight models.
The Sub-250g Pre-Flight Checklist
Before taking your new micro quad or park flyer out to the local sports field, run through this simple checklist:
- Check with the final battery installed: Always weigh your aircraft on a calibrated digital scale in its exact takeoff configuration, including battery strap, prop nuts, props, and any camera you plan to carry.
- Verify your scale accuracy: Calibrate your kitchen or bench scale using a standard nickel coin (a US five-cent coin weighs exactly 5.000 grams). If your scale drifts by two grams, your build might not be as legal as you think.
- Keep wiring neat and short: Eliminate service loops, excess lead lengths, and heavy plastic shrink tubing.
- Secure your battery firmly: On sub-250g builds, avoid metal-buckle rubberized straps that weigh 5 grams. Use a lightweight micro hook-and-loop strap combined with a strip of high-friction silicone battery pad to keep the pack from ejecting in hard turns.
- Confirm your TRUST certificate: Keep a digital copy or paper printout of your FAA TRUST completion card in your transmitter bag. It is free, never expires, and keeps you fully compliant regardless of what airframe you fly.
Watching the grams on your workbench pays off immediately in the air. Lighter models accelerate faster, survive crashes with less damage due to lower kinetic energy, fly quieter, and keep your weekend hobby sessions simple and hassle-free.